
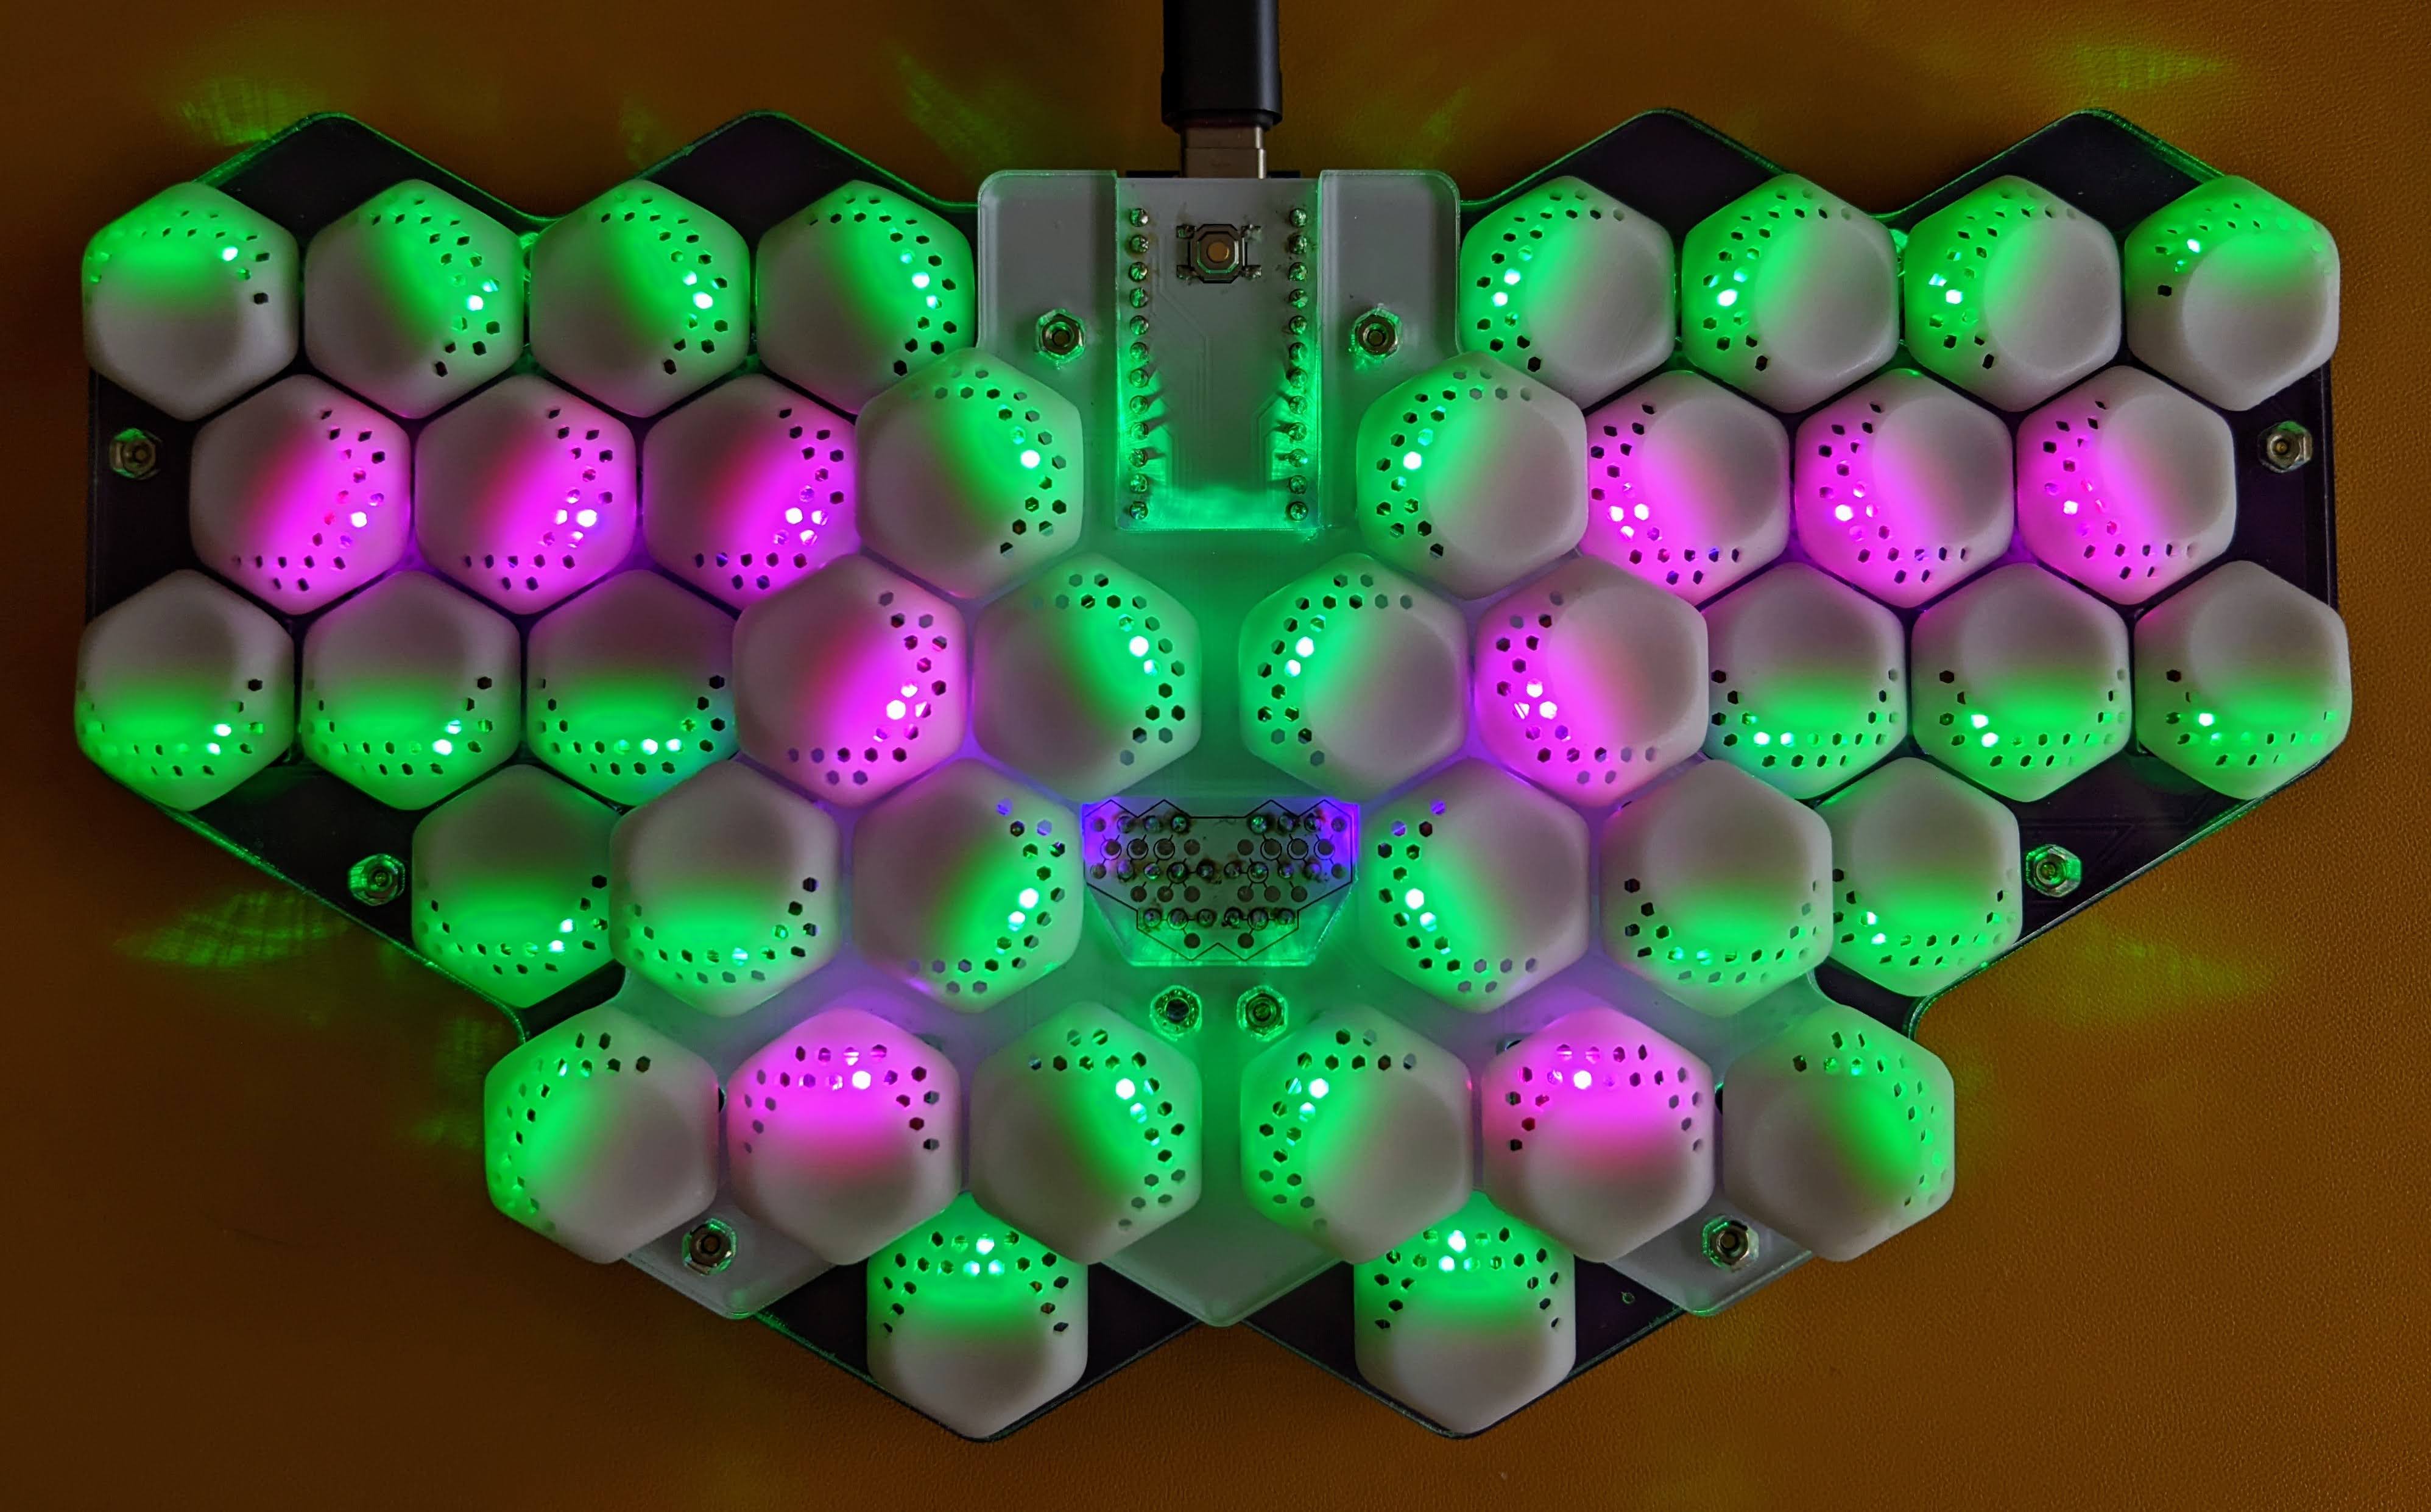
I teased Mantis v0.3 with two previous posts. I finally finished building it over the weekend and updated the QMK firmware including RGB Matrix support. I’ve been typing on it all day and it’s a joy to use. The layout and keymap are mostly the same as what I had on v0.2 before.
Shout-out to PCBWay for sponsoring the manufacturing of the first batch of prototype PCBs and key caps. The acrylic case plates were made locally in Toronto at Hot Pop Factory.
The design and firmware are mostly up-to-date on GitHub (still need to finalize some minor tweaks to the case plates). Here are some more pictures.
I need to spend more time with the RGB Matrix features in QMK. For now I’m using the ALPHAS_MODS mode to highlight the home row and home thumb keys.
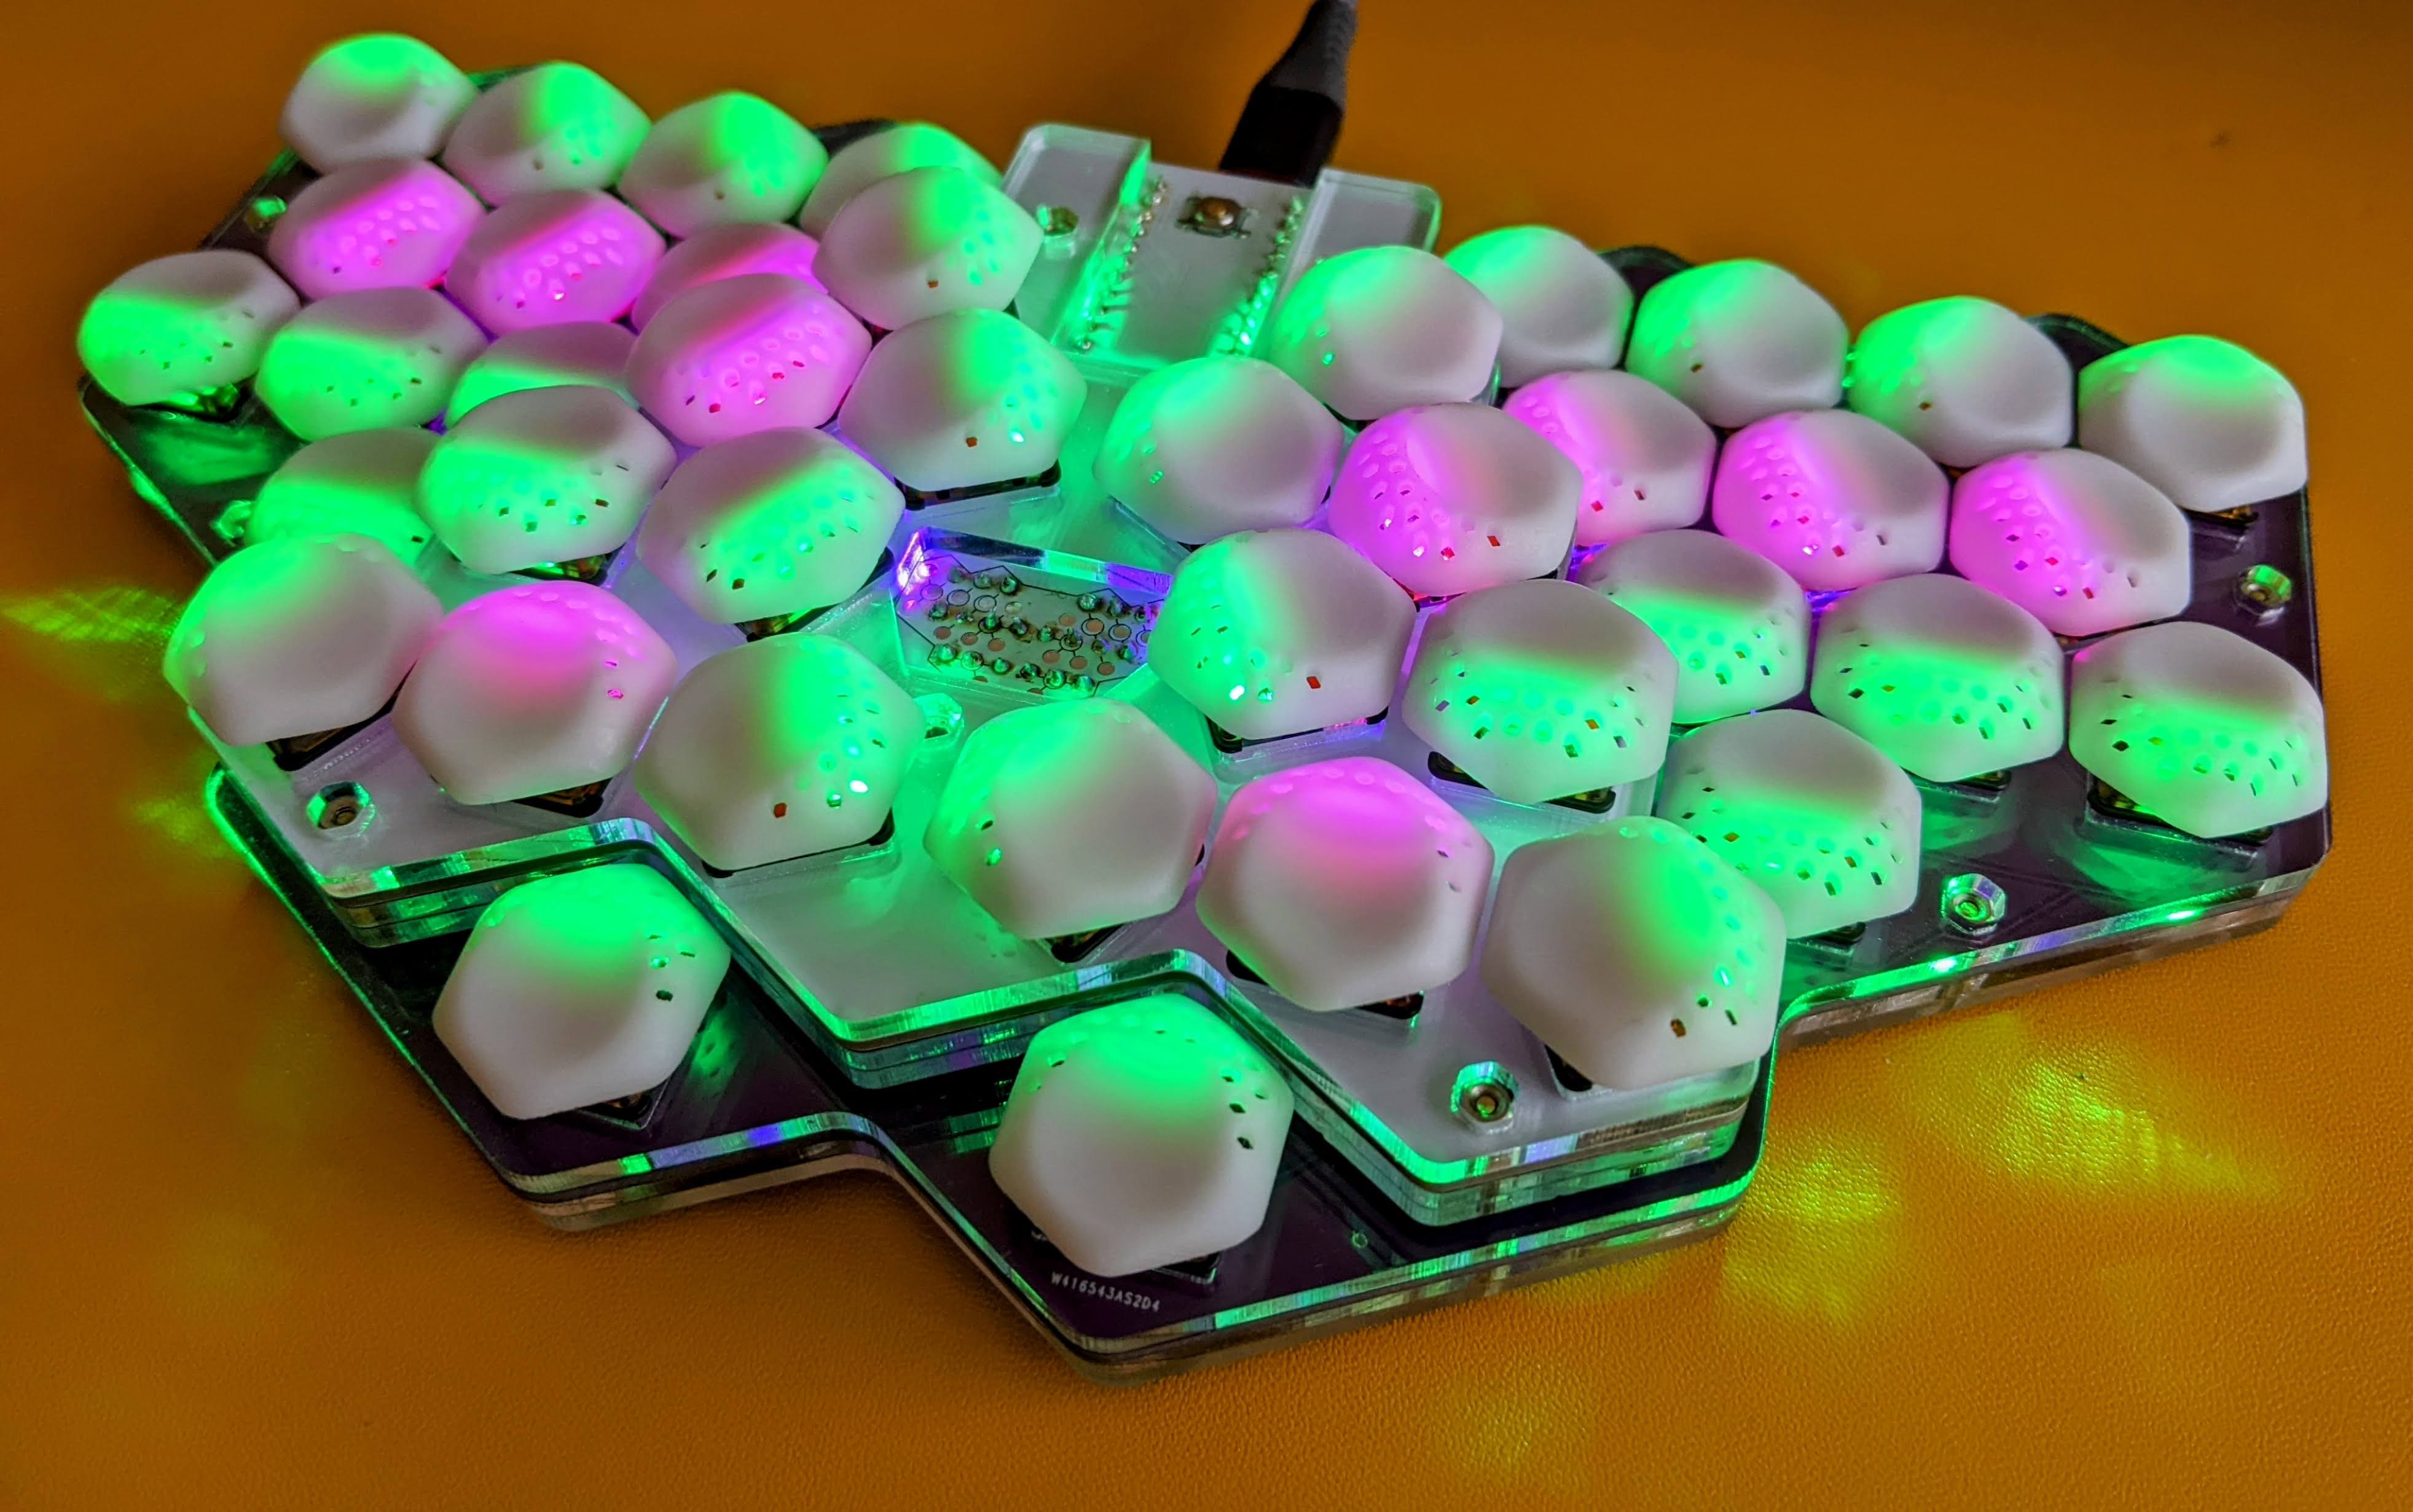
Here is the same perspective with the LEDs off, which makes it easier to see the curves of the key well. The key cap is my own design, 3D printed in resin by PCBWay. They came out great. I only needed to remove some small left overs of supports from the bottom where it interfered with the switch stem. No big deal, my thumb nail was the only tool needed. The stems feel very solid so I was not worried about swapping key caps on and off a few times during the fit and build process. The shape and dimensions are true to the design, so they fit pretty tightly to the switches and their neighbours. The surface of the spherical dish feels slightly textured, a bit like a PBT key cap. The little holes in the keys were meant to allow light to shine through. But the material turns out to be translucent, which is nice, so I’ll have the next batch made without those holes.
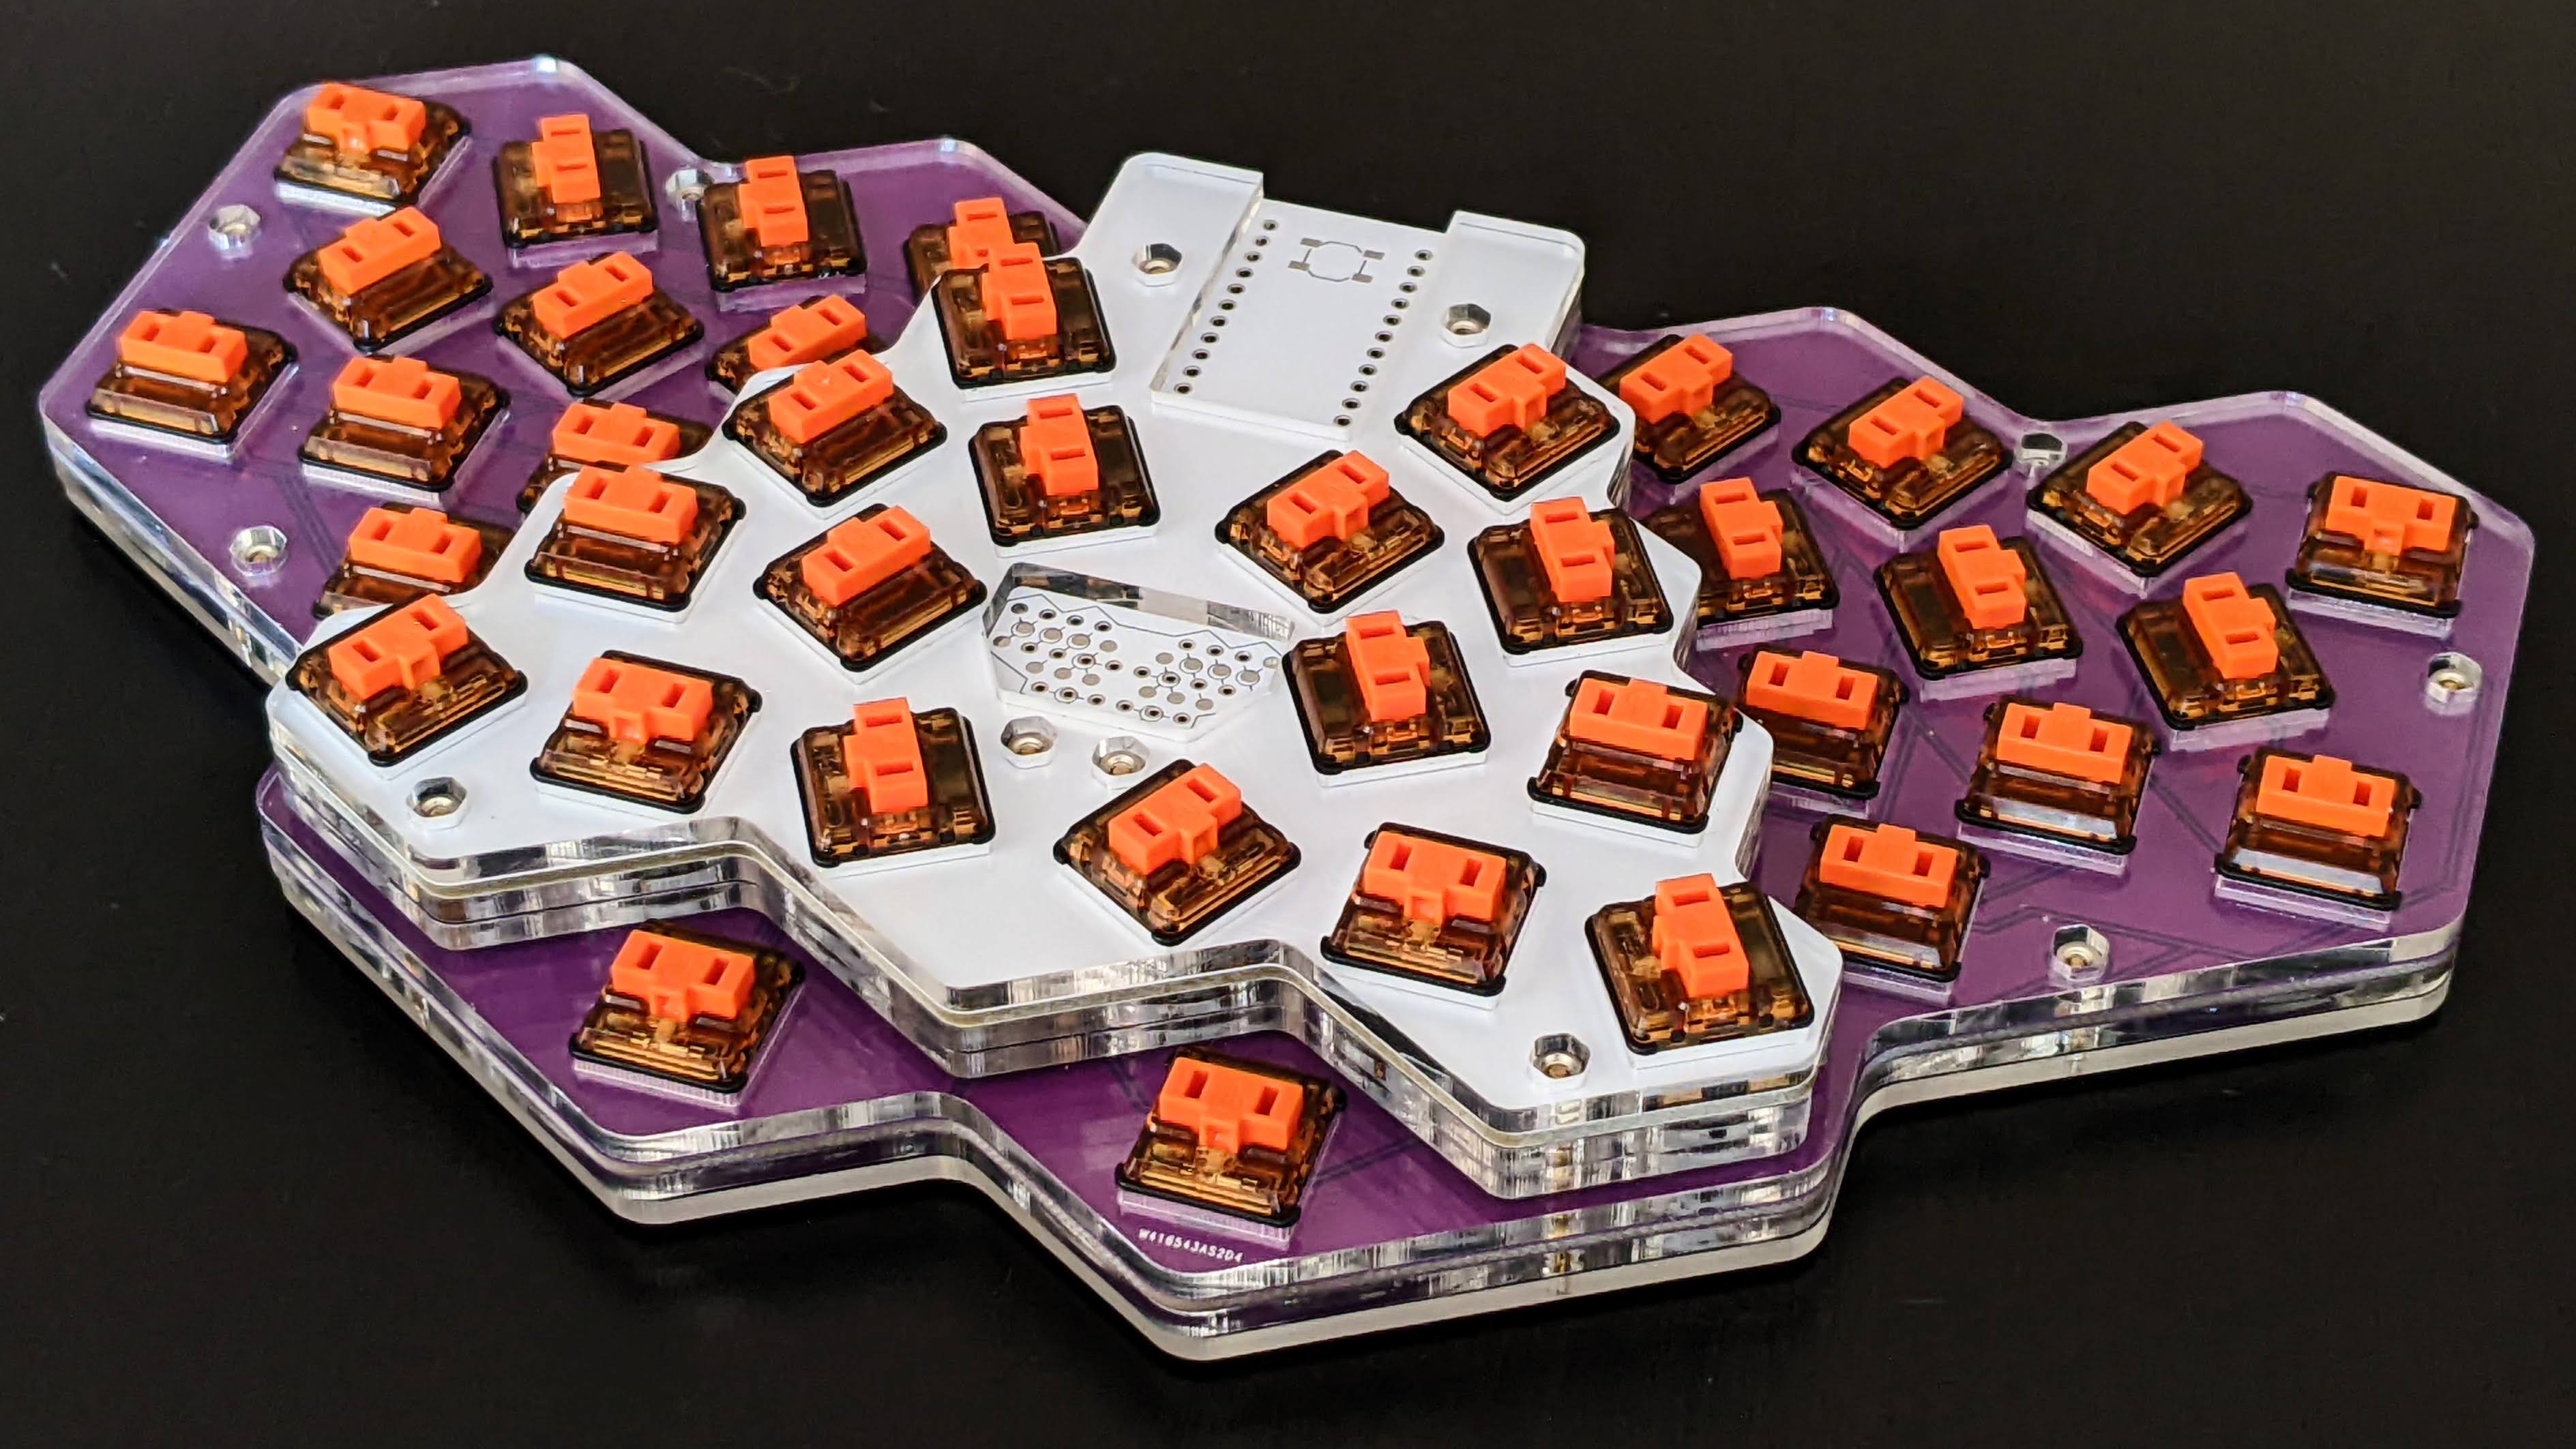
The key caps are designed parametrically in OpenSCAD. I generated only a single key cap profile for this build. The key well shape comes from rotating the switches in 60° increments on different rows and thumb key positions, as well as the raised PCB for the index finger and most thumb keys. I built this one with Sunset (tactile) switches that I took off one of my v0.2 builds. They sound and feel good on this keyboard, but I’m going to build a second one with linear (Pro Red) switches for comparison.
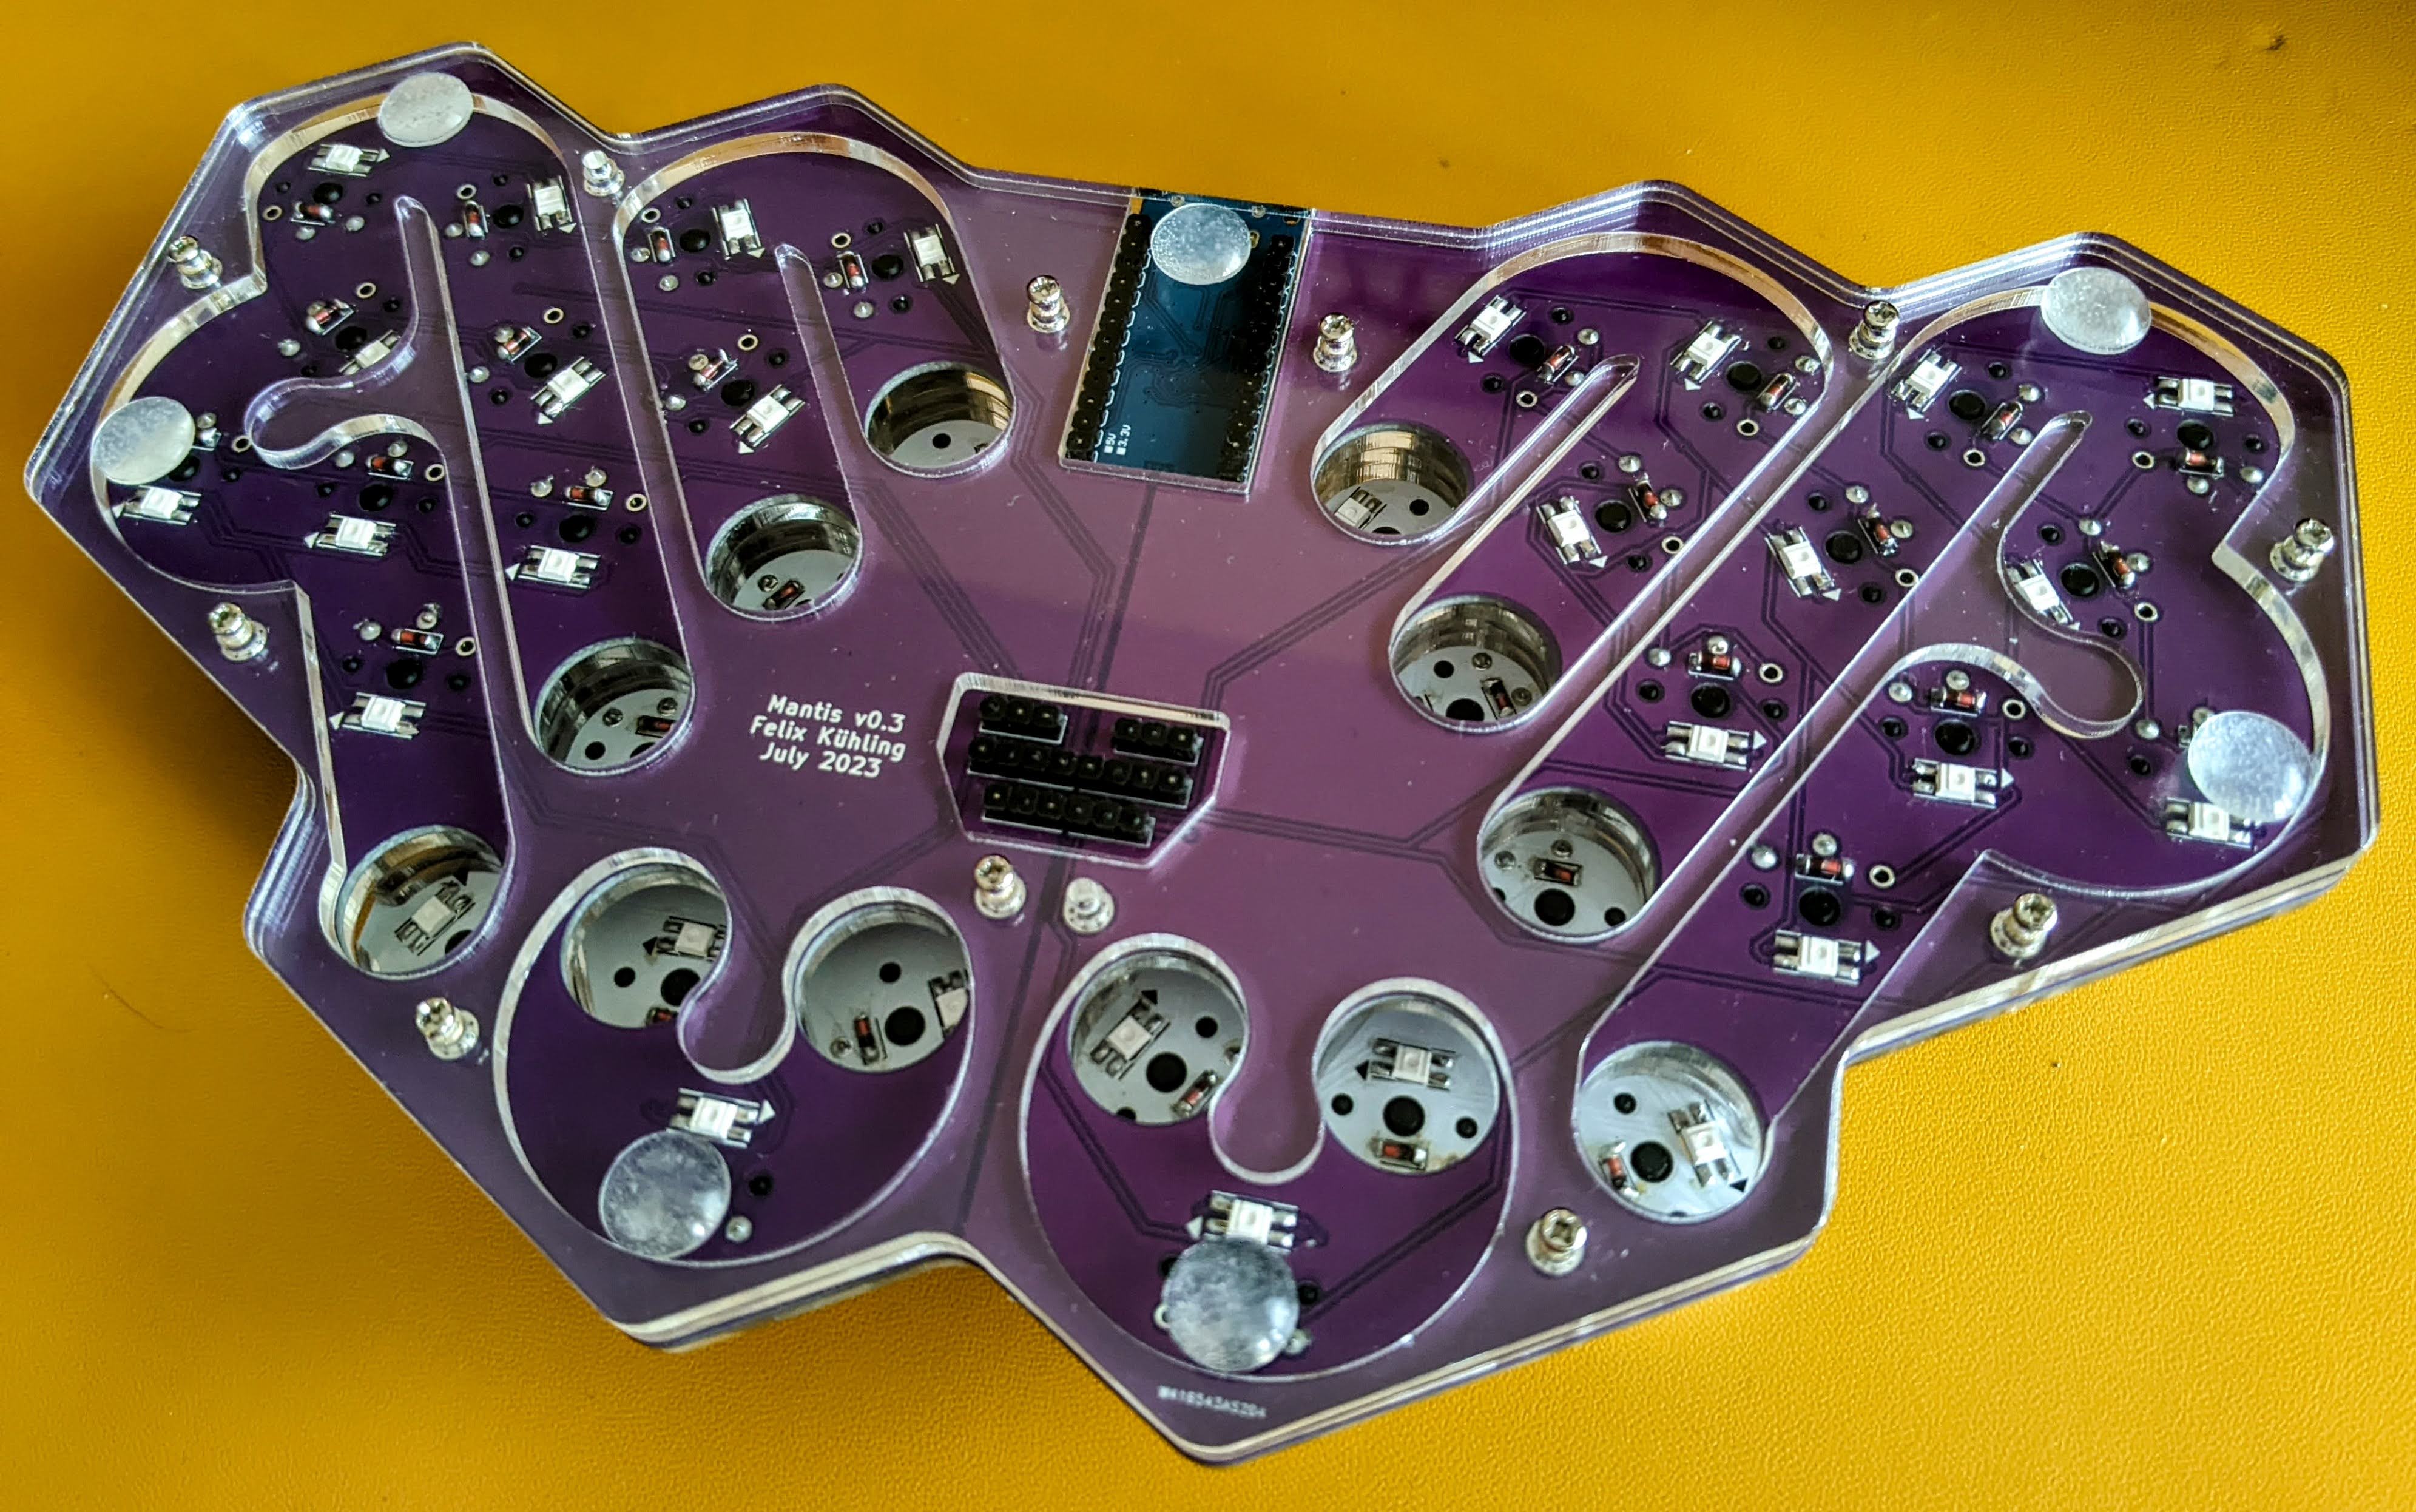
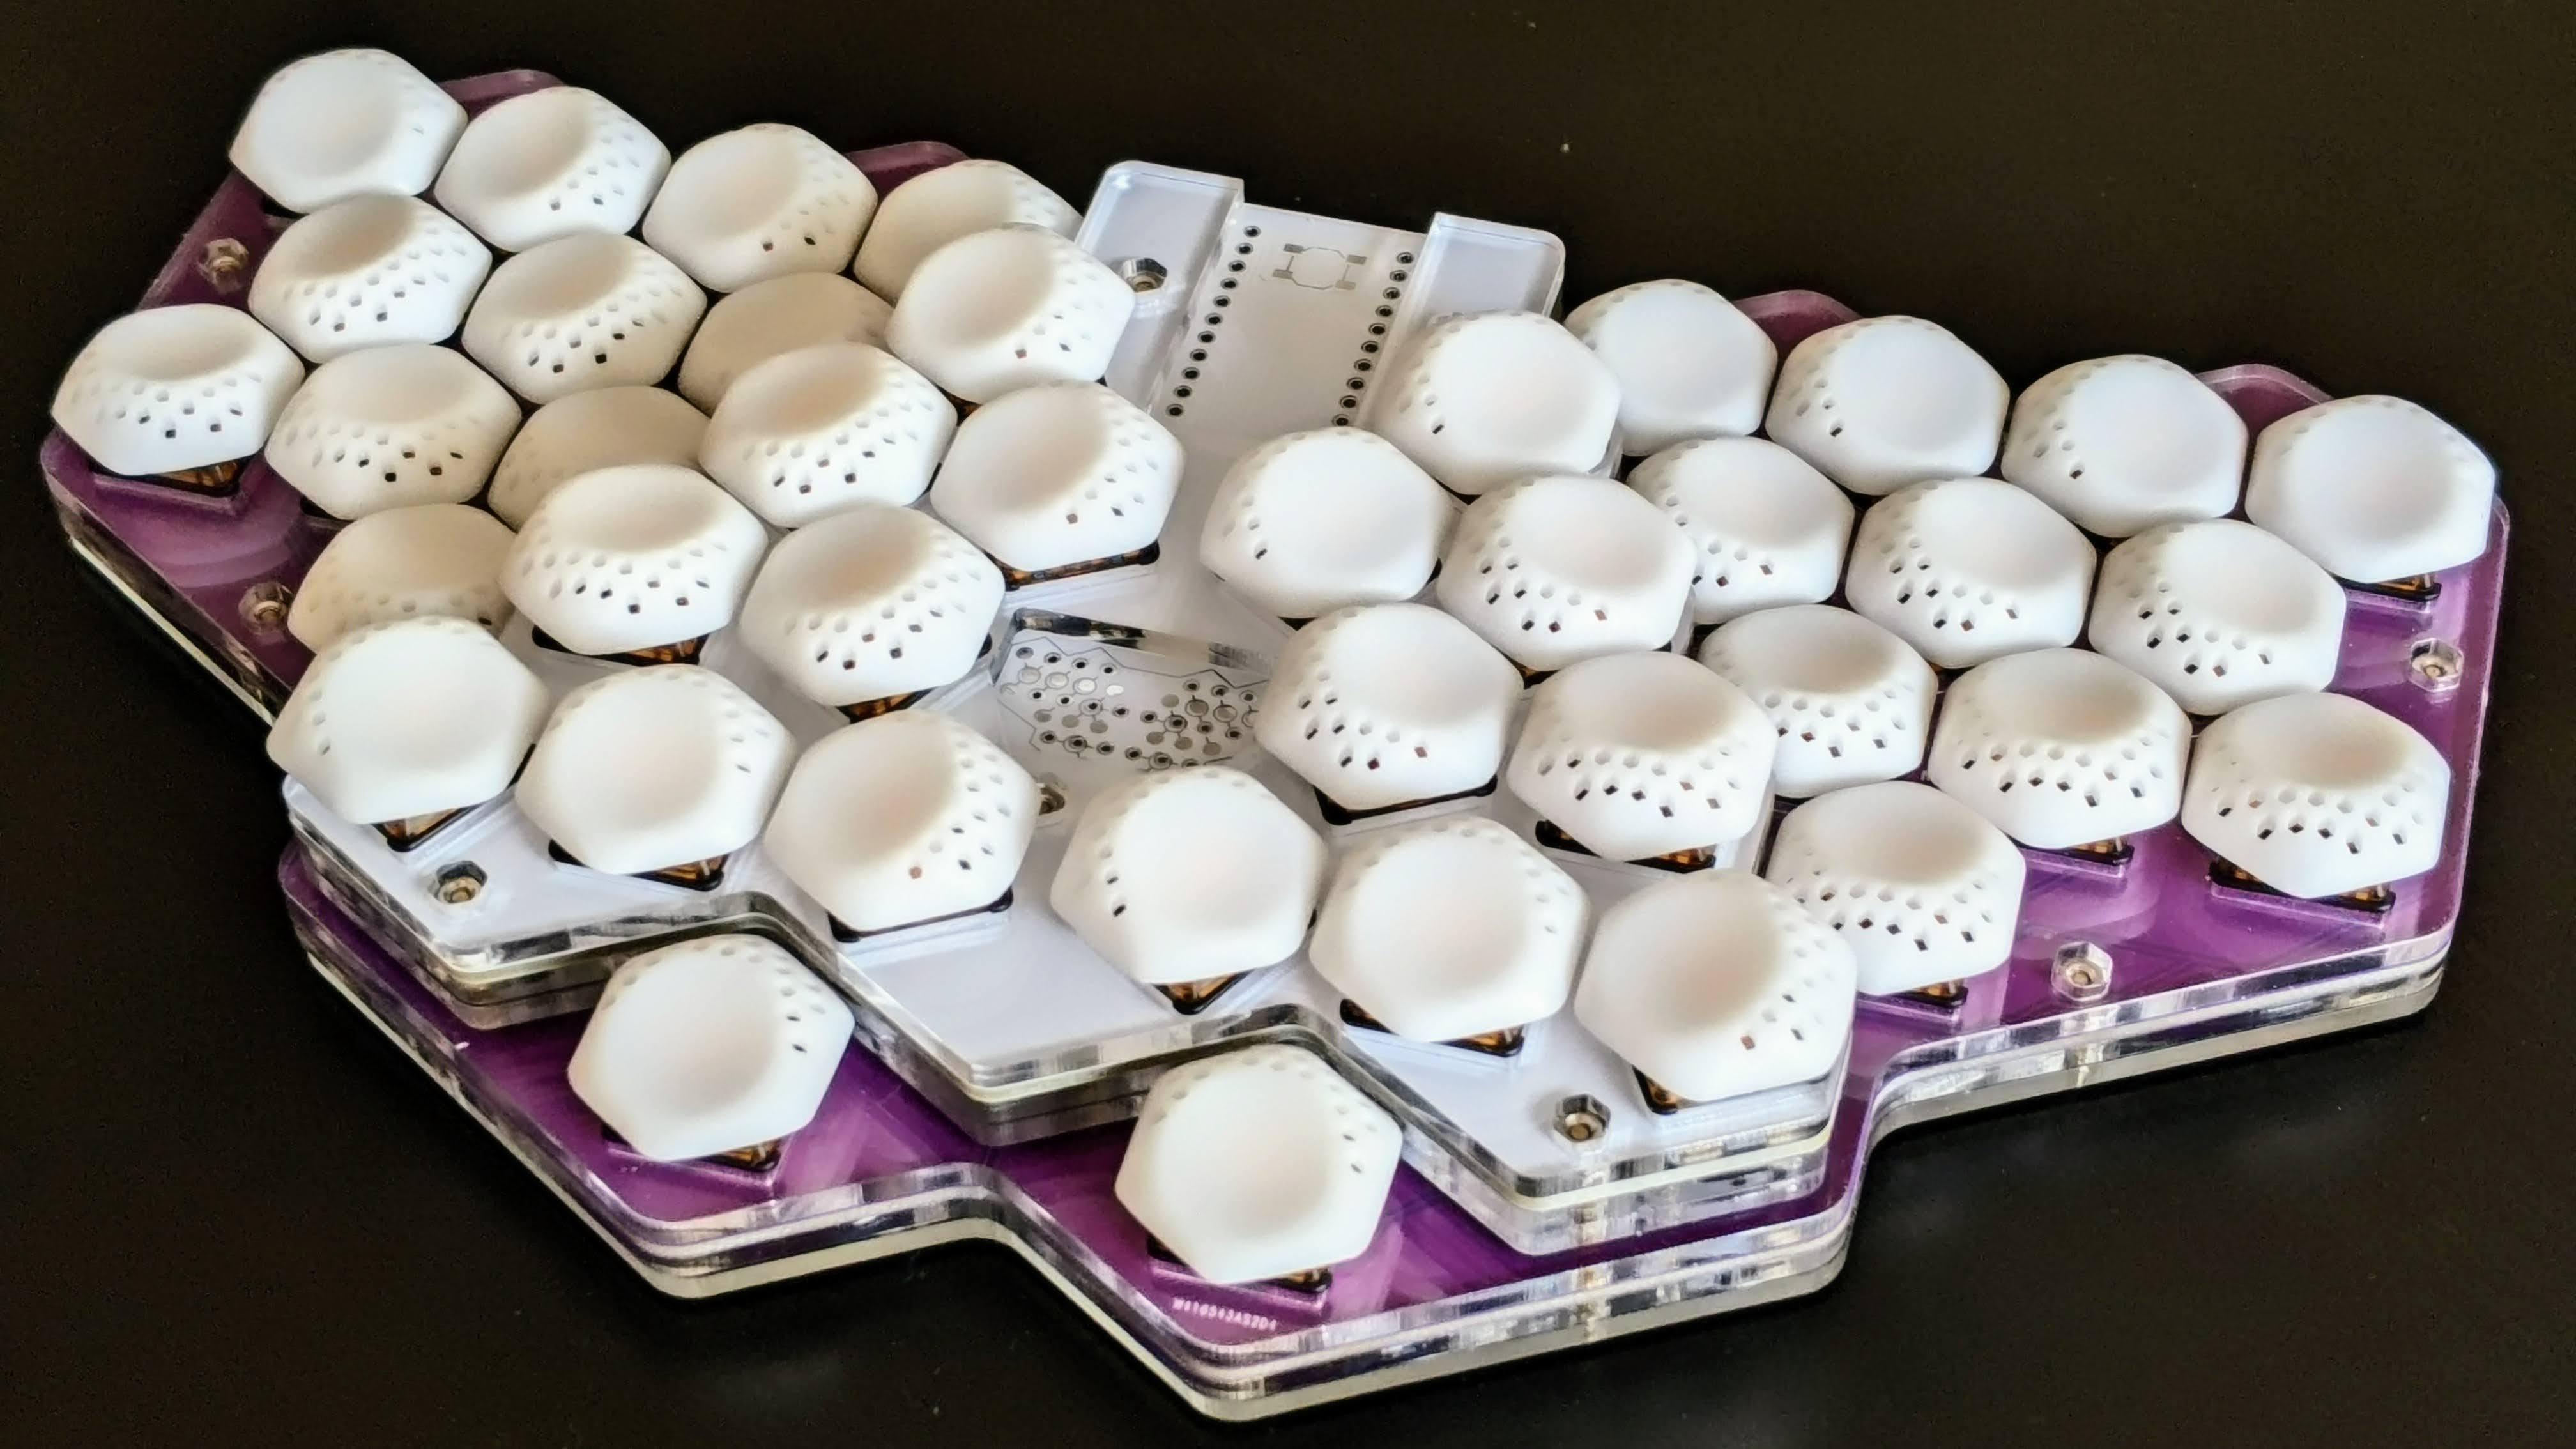
The bottom view shows the reversible split bottom PCBs that make it slightly cheaper to manufacture in small batches. The fit is really good, with basically no gap between the PCBs and a perfect fit with the single-piece switch plate. I chose the more expensive purple solder mask for aesthetic reasons. It does look nice and I like the contrast with the white top PCB and key caps. Diodes and LEDs are surface-mounted from the bottom and sit inside the sound channels that meander under the switches of the two keyboard halves. I couldn’t make this design work with hot-swap sockets, so the switches are committed to this keyboard now.
I’ll do a sound comparison with and without the mid-layers that contain the sound channels at some point when I build the second prototype. Meanwhile I’ll finish writing a build guide and do some more work on the firmware: add support for Vial and and play with the RGB features. Then I want to design a 3D printed version of the case, which would enable a simple one-stop shop way of ordering all the non-standard components from PCBWay or other PCB manufacturers that also offer 3D printing services. If that requires changes to the PCBs, it may turn into v0.4.
With the right key mapping the hex grid naturally leads to hand rotation and column stagger. It also takes “1u distance from home” literally because there are no diagonal keys for the index fingers and pinkies that are 1.4u away. It allows keys to rotate in 60° steps rather than 90° steps. That allows for some interesting ways to exploit tilted key cap profiles.
I may ask the opposite: why squares? That’s just as arbitrary, if you think about it. I learned typing on a mechanical typewriter that had round keys.
Interesting :) I may look more into it, thanks